Home | New | Guides | Tables | MOPs | Links
Modular Maps: MOPs

 Modular Maps (MOPs) are independent maps that adhere to a simple set of rules, so that a MOP can easily connect to the edge of another MOP.
They are flexible, scalable, and great for terrain sharing.
The rules below can be followed strictly or relaxed.
The more relaxed, the less compatible a MOP will be with other MOPs.
HERE is a table listing all of my MOPs.
Click on the MOP# to view its assembly instructions.
Modular Maps (MOPs) are independent maps that adhere to a simple set of rules, so that a MOP can easily connect to the edge of another MOP.
They are flexible, scalable, and great for terrain sharing.
The rules below can be followed strictly or relaxed.
The more relaxed, the less compatible a MOP will be with other MOPs.
HERE is a table listing all of my MOPs.
Click on the MOP# to view its assembly instructions.
There is a simple point-value system explained below that assigns a price to each terrain object and to the height of each open space.
With a total point limit for combining terrain and figures, players could bring a
pre-made MOP along with a pre-made army, or draft a MOP while drafting army cards.
(I haven't experimented much with this point-value system, so it may go through some
changes in the future.)
There are instructions explained below for making "MOP Trays".
These trays make it easy to move MOPs on and off the table and carry them around.
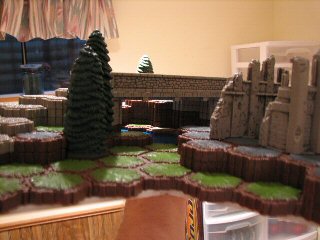
 A 1‑hex MOP is hex shaped, with 5 terrain spaces along each of the 6 sides.
A MOP with more than 1 hex is needed if the hexes can't be separated due to terrain
tile arrangement.
MOPs with sides having 7 or even 9 spaces could work but for now my focus is on 5
spaces.
A 1‑hex MOP is hex shaped, with 5 terrain spaces along each of the 6 sides.
A MOP with more than 1 hex is needed if the hexes can't be separated due to terrain
tile arrangement.
MOPs with sides having 7 or even 9 spaces could work but for now my focus is on 5
spaces.
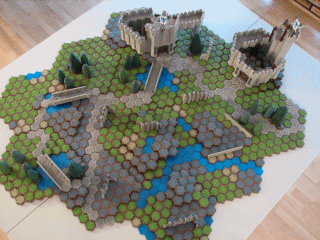
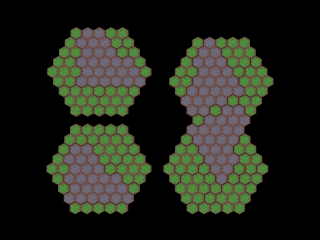
When connecting two MOPs, align the connecting sides with a "clockwise twist".
A MOP that is bigger than 1-hex needs to have this clockwise twist built into its
shape.
To connect MOPs just push them together, leaving a small gap between the "connecting"
edges. You could also lock the edges together, but it is not really necessary.
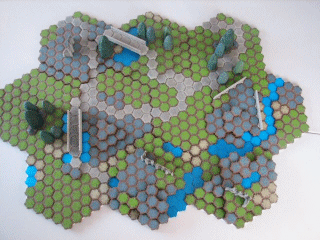
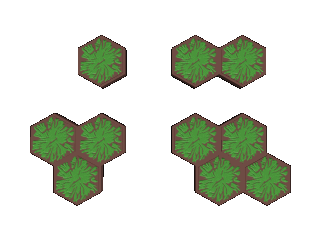 Using each grass terrain space to represent each hex within a MOP, the image to the
left shows the 4 recommended MOP shapes.
These 4 are called the "core shapes". They are preferred because they are small and
compact.
Using each grass terrain space to represent each hex within a MOP, the image to the
left shows the 4 recommended MOP shapes.
These 4 are called the "core shapes". They are preferred because they are small and
compact.
Ultimately, there is no restriction on the shape or number of hexes in a single MOP.
But remember, there is only so much room on the table.
The more MOPs you can fit on a table the more variety you will have for rearranging
them into many different maps.
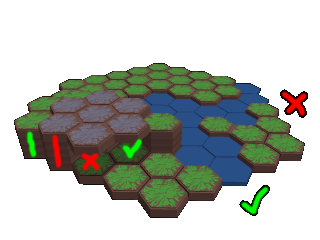 The maximum number of levels anywhere along an edge (side) is 4 levels.
There should be no vertical gaps (overhangs) between levels anywhere along an edge.
The maximum number of levels anywhere along an edge (side) is 4 levels.
There should be no vertical gaps (overhangs) between levels anywhere along an edge.
If placed on the edge, certain types of terrain tiles should only be placed at level
1 and on the center edge space.
Optionally, the same terrain type may also be at level 1 on an edge space that is
on either side of the center edge space, but not on both sides.
Currently any Water, Road, Molten Lava, Ice or Swamp Water tile should follow this
rule.
 Non-tile terrain objects should not be covering an edge space. Currently any Ruin,
Evergreen Tree, Glacier Mountain, Warehouse Ruin, Jungle Tree, Jungle Brush or Rock
Outcrops should follow this rule. Also, no part of a Long or Short Ruin should be
on a gap between two edge spaces.
Non-tile terrain objects should not be covering an edge space. Currently any Ruin,
Evergreen Tree, Glacier Mountain, Warehouse Ruin, Jungle Tree, Jungle Brush or Rock
Outcrops should follow this rule. Also, no part of a Long or Short Ruin should be
on a gap between two edge spaces.
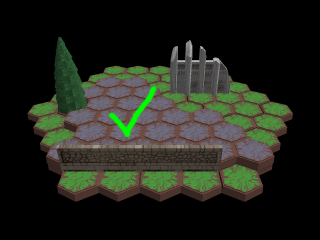
It's alright to put a Battlement, Ladder Rung or end of a Stone Wall in between two
edge spaces. However, these terrain objects should not be conneted to the outside
edge of an edge space.
Even though it can be used as terrain, the Marro Hive and/or its Swamp Water Base
should not be built into a MOP.
That's all of my MOP rules so far. Hopefully you will find them simple to use without
being too restrictive. Go ahead and give them a try!
Point-Value System for MOPs (or any Battlefield)
Step 1: Determine which spaces are open for figures to stand on. An open space is any terrain tile space, other than Molten Lava, with nothing stacked on top of it and with a clearance of 5 levels (like spaces under a bridge, or overhang). Note: Tiles like water, lava or ice may not have "height" in game mechanics, but they should be considered half a level high for determining clearance. In other words, 4.5 levels of clearance is not the same as 5 levels, and therefore is not an open space.
Step 2: Add up height-points for all open spaces. For example, an open space on level 3 has a height-point value of 3. Simple. Another example; an open space for water or ice on the table is on level 0 (zero) and has a height-point value of 0 (zero). Don't add in height-points for non-open spaces like a space with a tree on it for example.
Note: To calculate an average height, take the total height-points from Step 2 and divide it by the total number of open spaces from Step 1.
Step 3: Add in points for types of terrain for all open spaces.
- For each
- Water space add 0.25
- Snow or Ice space add 0.75
- Grass, Rock, Sand, Asphalt, Concrete, Swamp or Swamp-Water space add 1
- Road, Wall-Walk or Shadow space add 1.5
- Lava-Field space subtract 0.25
Step 4: Add points for non-tile terrain objects.
- For each
- Short Ruin add 4
- Long Ruin add 6
- 1-hex Evergreen Tree add 2
- 4-hex Evergreen Tree add 5
- Stone Wall add 5
- 1-hex Glacier Mountain add 1
- 3-hex Glacier Mountain add 3
- 4-hex Glacier Mountain add 5
- 6-hex Glacier Mountain add 9
- Battlement add 0.5
- Ladder Rung add 1.5
- Fortress Door add 10
- Underbrush add 3
- Palm Tree add 4
- 1-hex Rock Outcrop add 1
- 3-hex Rock Outcrop add 3
- Warehouse Ruin add 8
- Breakable Wall Section add 4
Step 5: Take total points and round to the nearest multiple of 5. This is the total value of the MOP.
MOP Trays
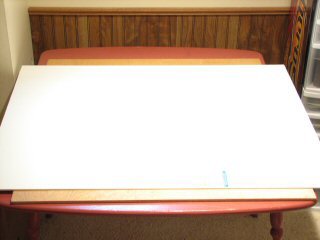
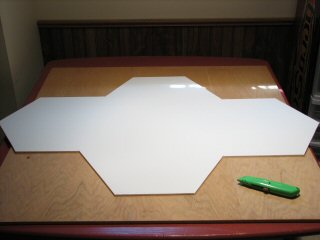
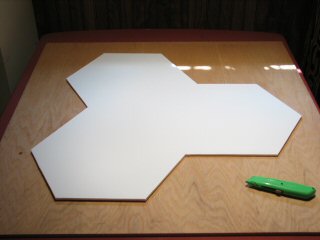
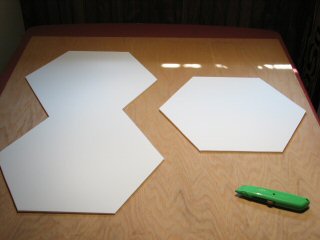
An inexpensive way to make MOPs portable is to use Foam Board for support. Elmer's Foam Board is easy to find. There are other more sturdy (more expensive) foam boards. The 20" x 30" boards can be found just about anywhere, but for the 30" x 40" boards you'll have to go to OfficeMax, Staples or some other office supply store. Lay the board out and build a generic MOP in the shape desired. For this example we are making a support for a 4-hex MOP.
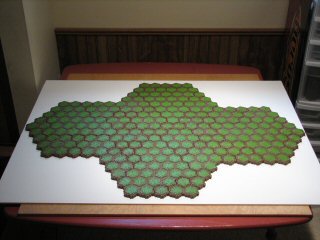
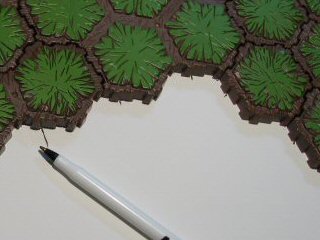
Take a pen or pencil and place its tip on the foam board at the vertex between two hex-spaces along the edge. Without making a mark yet, move the tip to the right, to the first "tooth" that sticks out. Then make a mark on the right side of this tooth. Do this for every vertex around the MOP. Remove the terrain and use a straight edge to connect the dots.
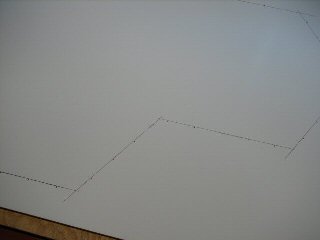
Use a utility knife to cut out the shape. Make a tray for the 4-hex, 3-hex, 2-hex and 1-hex Core MOP shapes. These will be templates for future MOP Tray copies. Rather than marking dots between terrain spaces, just trace the template for the desired shape.
To see if the foam board is strong enough, let's build a hefty MOP (1 Master set and 2 Road/Forest sets, MOP 5112). It works! Here it is being held up with one hand in the center. And a "volunteer" to show that even a kid could carry it around.